Configuring category timing
This guide explains how to set timing for a product category so that it appears on the billing screen in the Staff App only during scheduled times.
Prerequisites
-
You are logged into the Merchant App with Edit access to Inventory / Category.
-
Product categories are already created (for example, Breakfast, Lunch, Snacks, Dinner).
Step 1: Open the Categories screen
- From the main dashboard, go to Inventory → Category.
- The list of existing product categories will be displayed.
Step 2: Edit the required category
- Find the category you want to schedule (for example, Breakfast).
- Click the three dots icon next to the required category and select Timing to open the Timing form.
Step 3: Configure category title
-
In the Timings form, enter a suitable name in the Category Title field.
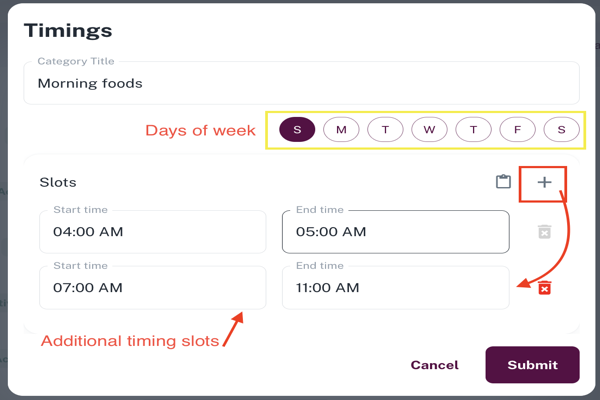
Step 4: Set days and time range
-
Days
-
Select the days when this category should be visible:
-
Example: Mon–Sun for all days, or only Sat–Sun for a Weekend Specials category.
- For each day selected, Enter the Time range
Set Start time and End time for the day. Example: Breakfast: 7:00 AM – 11:00 AM
-
-
-
(Optional) If your restaurant requires multiple time slots on a single day, add additional time ranges as needed clicking the + button and adding the Time Range.
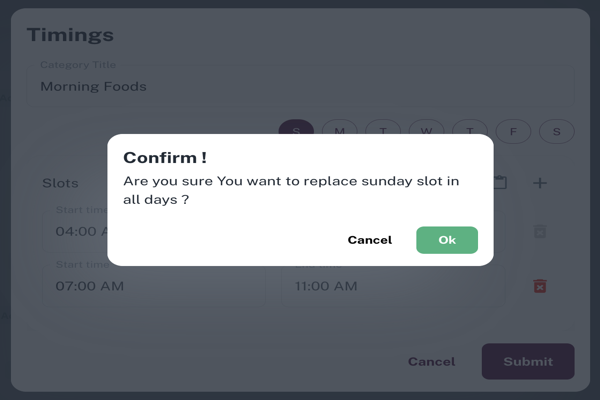
To apply the same time slot for all days, select ![]() icon and click Ok.
icon and click Ok.
Step 5: Save the category timing
- Review the selected Days and Time range.
- Click Submit to apply timing to the category.
For categories falling under same time slot, We can select already created Category Title from the dropdown and click Submit.
How category timing works on the billing page
- On the billing screen, only categories whose timing matches the current day and time will be shown.
- When the day and time moves out of the configured range, that category is automatically hidden from the billing page.
- Items inside hidden categories cannot be added from the billing screen until the next valid time slot.
Example
Configured timings:
- Breakfast: 7:00 AM – 11:00 AM
- Lunch: 12:00 PM – 3:30 PM
- Dinner: 7:00 PM – 11:00 PM
At 9:30 AM, the billing page will show:
- Breakfast (visible)
- Lunch (hidden)
- Dinner (hidden)
At 8:15 PM, only Dinner will be visible.
This helps ensure that staff can bill only the categories that are currently available, reducing errors and improving order flow.